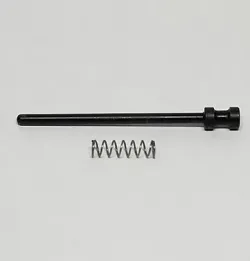
Follow these step-by-step instructions to install a SliXprings firing pin in compatible Uberti firearms. This guide covers the recommended tools, component removal, channel cleaning, installation, fitting considerations, function testing, and important safety precautions.
The SliXprings firing pin is a precision-machined replacement component designed to provide dependable ignition, durability, and consistent operation when correctly installed in a compatible firearm.
A replacement firing pin must move freely within the firing pin channel and must be installed in the correct orientation. Dirt, carbon, damaged components, improper alignment, or excessive fitting can interfere with safe and reliable operation.
Verify that the firing pin is intended for the exact firearm model before beginning installation. Firearm dimensions and tolerances can vary between manufacturers, models, and production runs.
Minor fitting may occasionally be required. Remove only the minimum amount of material necessary and check the fit frequently. Do not alter the firing pin tip, shorten the firing pin, enlarge retaining-pin holes, or make other modifications unless those procedures are specifically included in the instructions supplied with the product.
Point the firearm in a safe direction. Remove all ammunition, open the action, and visually and physically confirm that the chamber, magazine, and action are empty.
Remove all live ammunition from the work area before proceeding.
Remove the bolt, slide, or related action components according to the firearm manufacturer's disassembly instructions. Do not force components or use an improvised disassembly procedure.
Place the assembly on a bench block or other protected support. Carefully remove the firing pin retaining pin using the correctly sized punch.
Remove the original firing pin and spring, if present. Note their direction and orientation before removal.
Inspect the firing pin channel and clean away carbon, fouling, dried lubricant, metal fragments, and other debris that could restrict movement.
Also inspect the retaining pin and spring for damage, unusual wear, bending, or corrosion. Replace damaged components before continuing.
Compare the SliXprings firing pin with the original component. Confirm that you have the correct firing pin for the firearm model and that the major dimensions and retaining features correspond with the original part.
Insert the SliXprings firing pin and spring, if applicable, in the correct orientation. The firing pin should enter the channel without being forced.
Before installing the retaining pin, verify that the firing pin moves smoothly through its normal range of travel.
Align the firing pin assembly and carefully reinstall the retaining pin. Do not force the retaining pin through a misaligned component.
Confirm that the retaining pin is fully seated and that the firing pin is properly secured.
Reassemble the bolt, slide, or action according to the firearm manufacturer's instructions. Confirm that all pins, screws, springs, and related components are correctly installed.
Keep the firearm completely unloaded during all function testing. Do not use live ammunition to test firing pin operation.
Stop immediately if the firing pin binds, remains protruding, fails to return, or interferes with action operation. Disassemble the firearm and correct the problem before further use.
Check for debris, dried lubricant, burrs, an incorrectly installed spring, improper firing pin orientation, or a retaining pin that is not properly aligned.
Do not force it. Remove the firing pin and verify that the firing pin recess or retaining feature is correctly aligned with the retaining-pin opening.
Do not use the firearm. Check the channel for debris, verify spring placement and condition, and confirm that the replacement firing pin is the correct model.
Remove only the minimum amount of material required and check movement frequently. Have a qualified gunsmith complete the work if the required fitting is unclear or extends beyond light polishing.
Proper installation and testing are essential for safe firearm operation. SliXprings is not responsible for damage or injury resulting from improper installation, unauthorized component modification, use in an incompatible firearm, or failure to follow applicable firearm safety procedures.
A printable version of these instructions is available in PDF format.
Open Firing Pin Installation Instructions PDF
The PDF opens in a new browser tab or window.
Back to Top